24 Gallon Transit Van Spare Tire Tank TR-ST-24

$339.00

Fast & Free Shipping in Continental US

In Stock · Ready for Shipment

Made in the USA

SKU: TR-ST-24 Categories: , ,

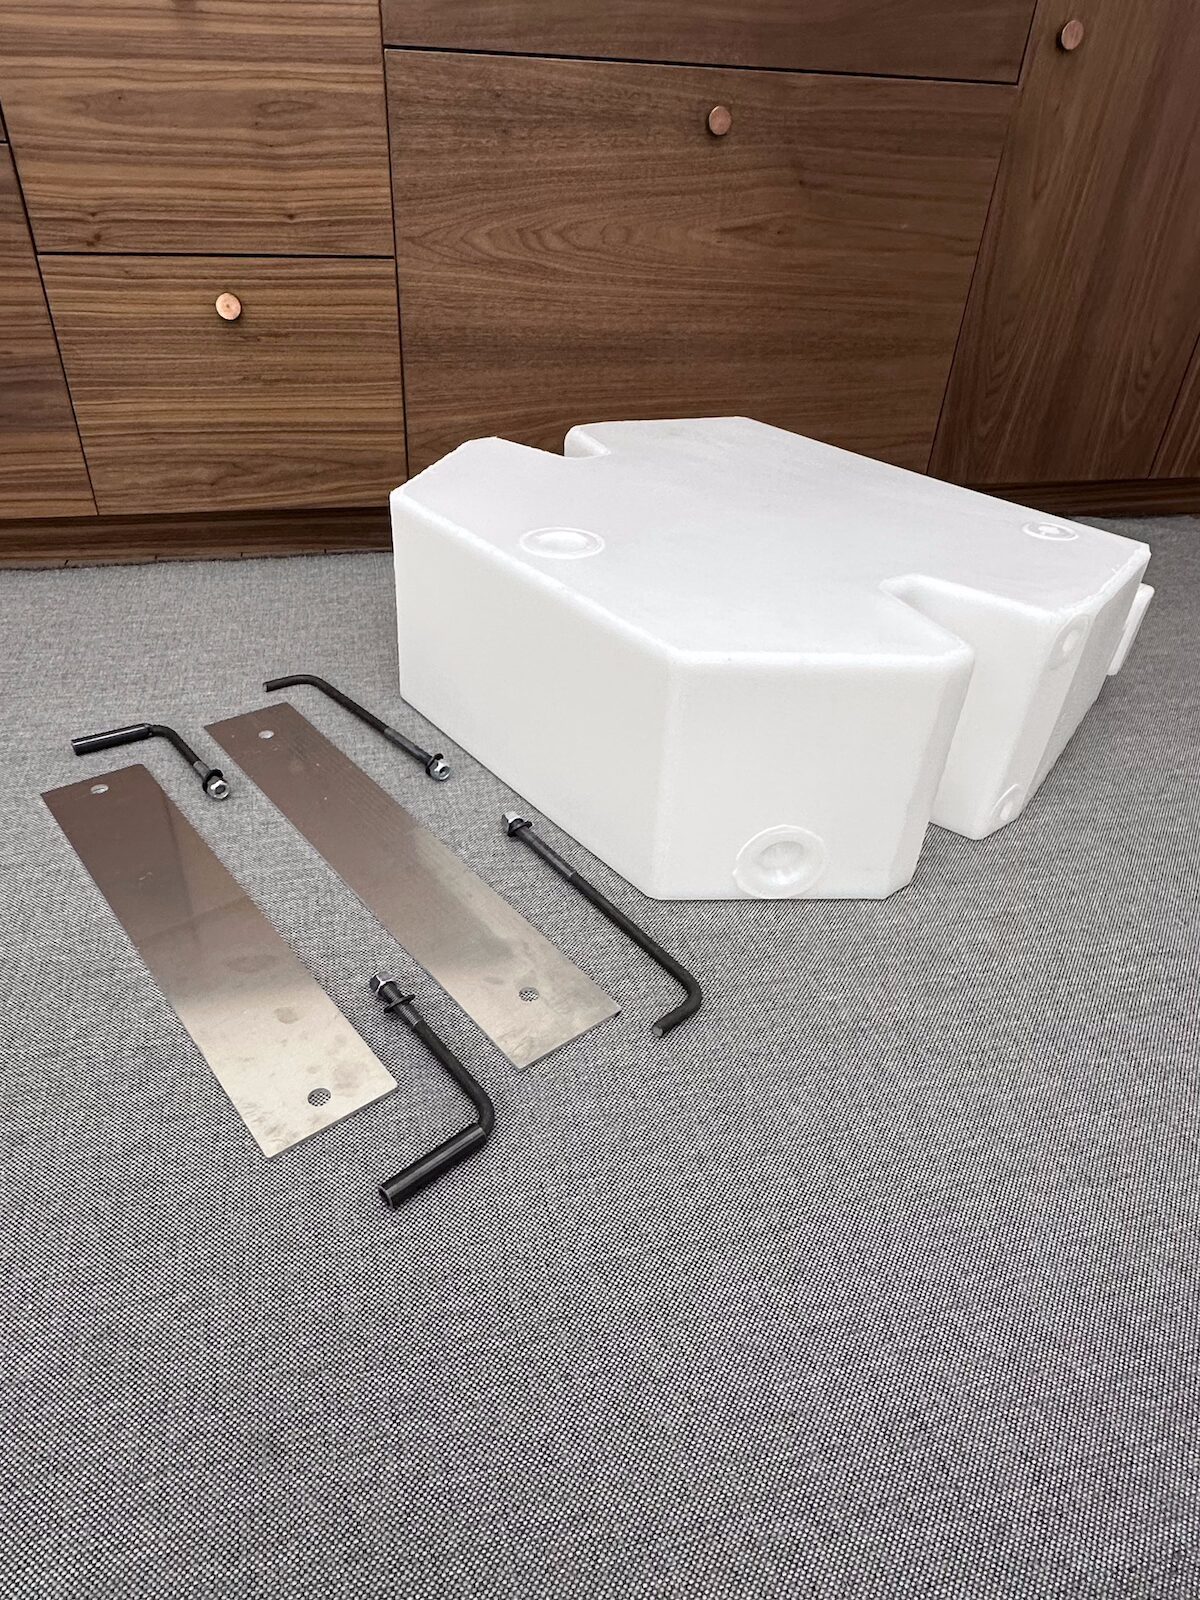
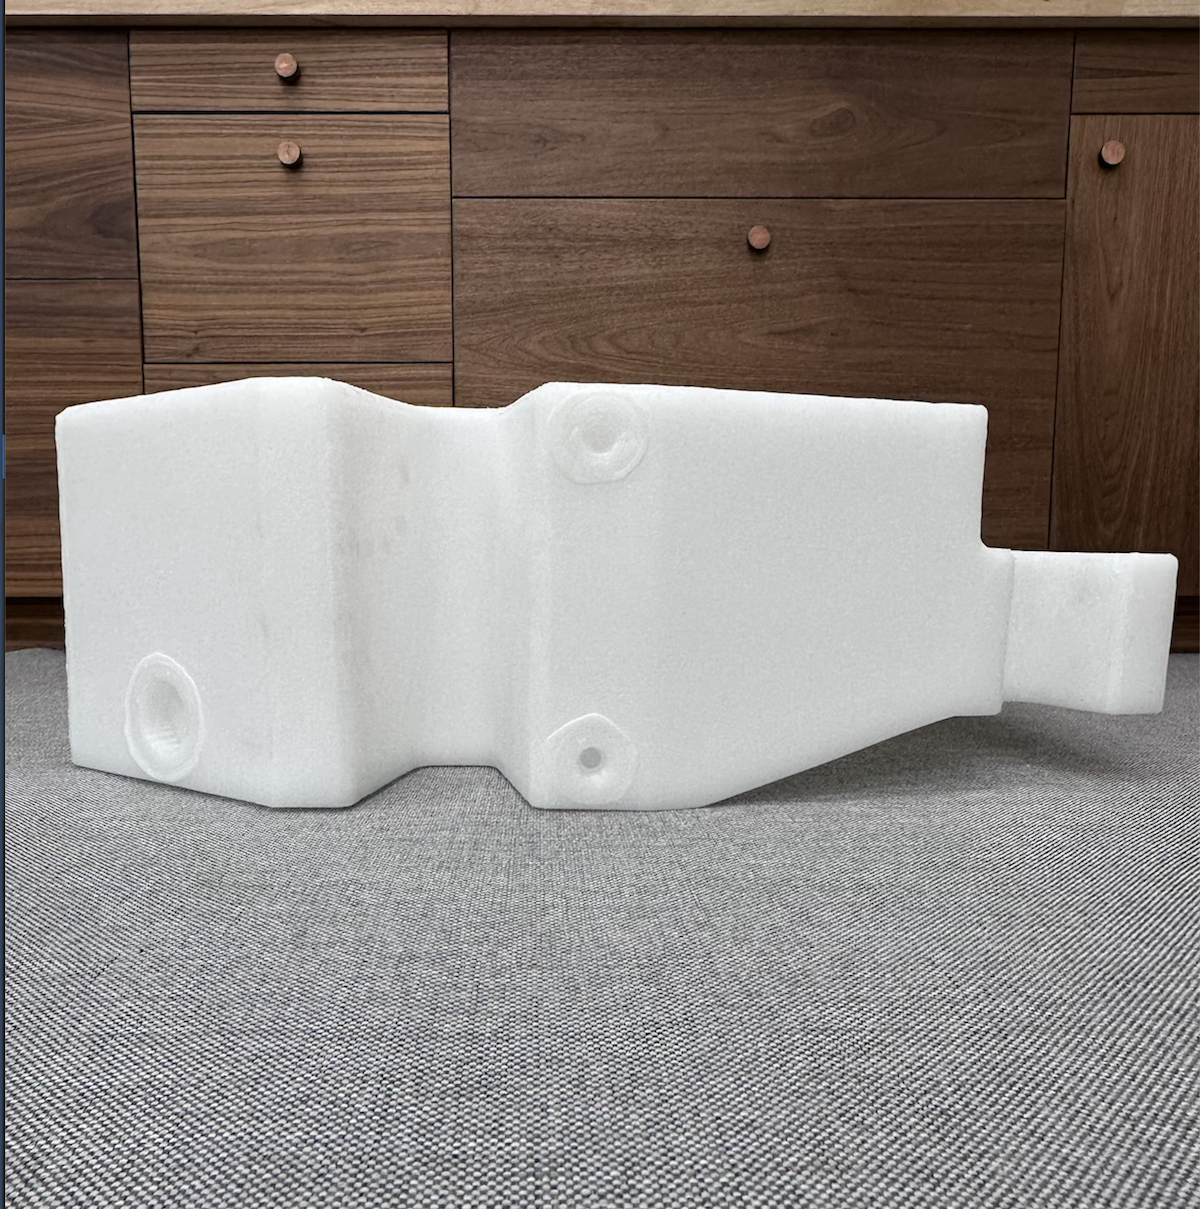
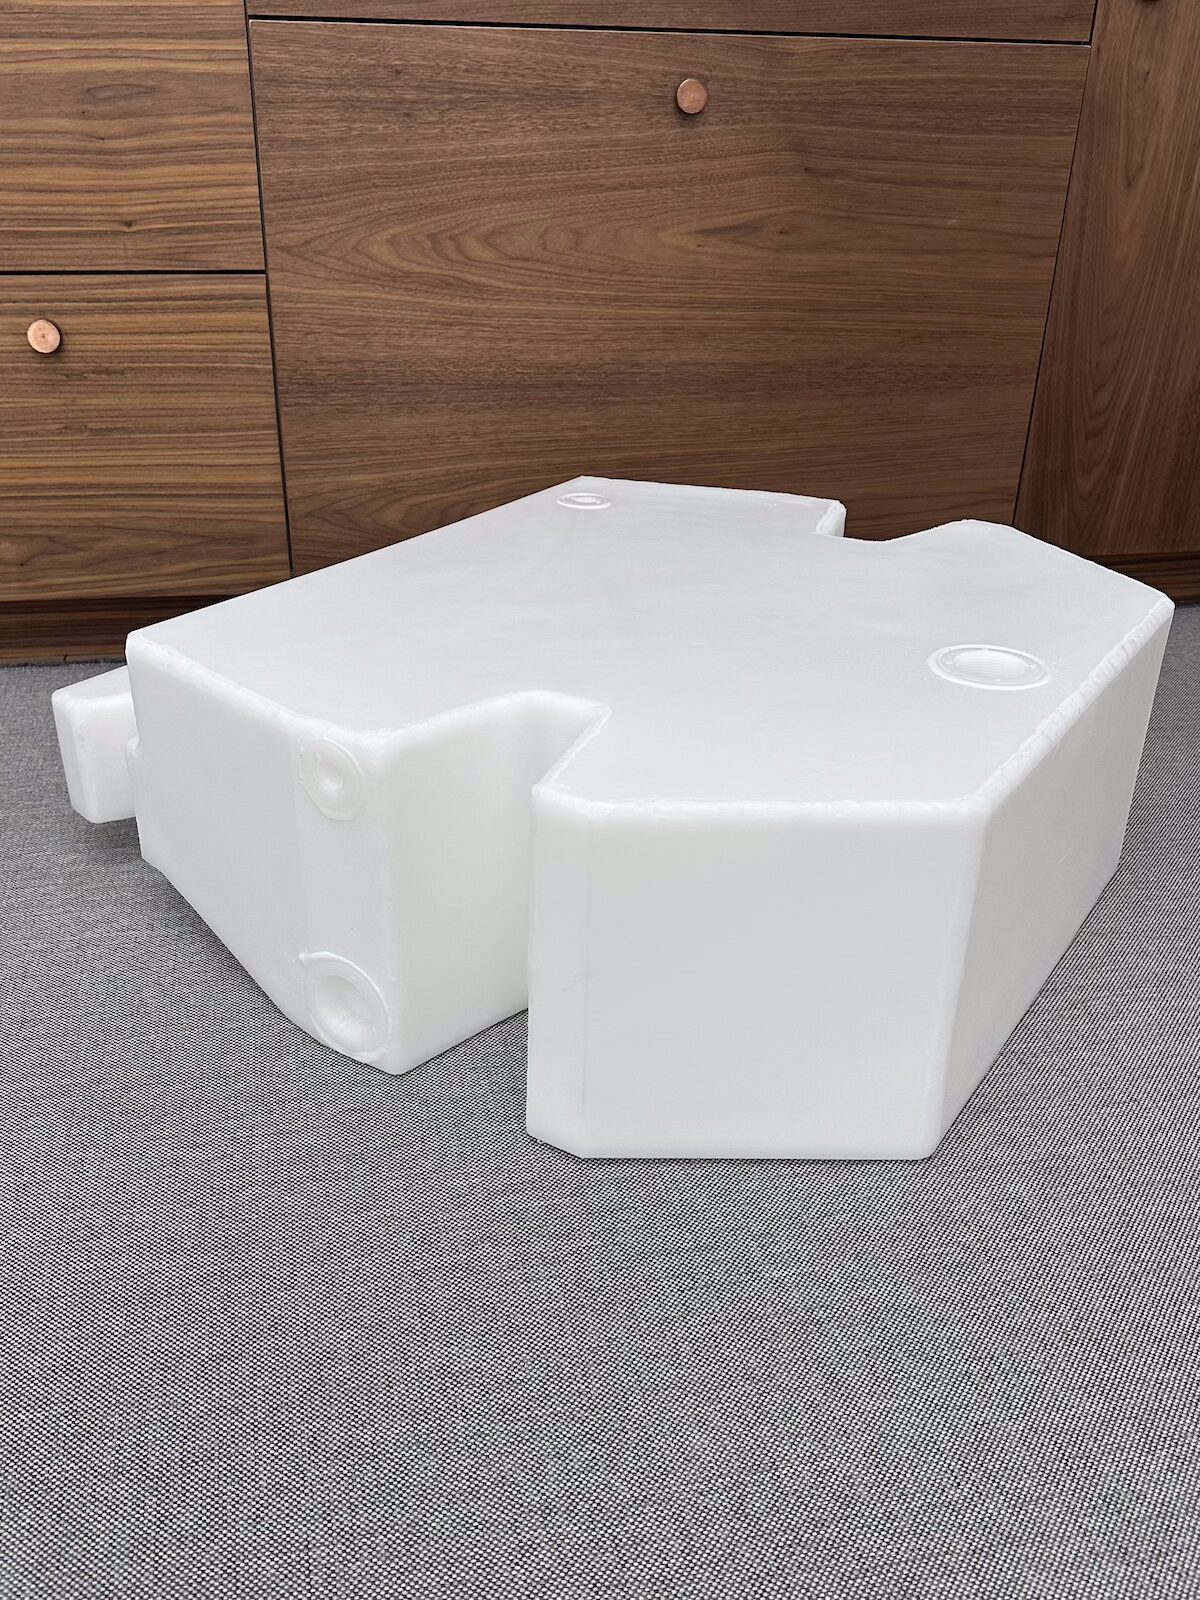
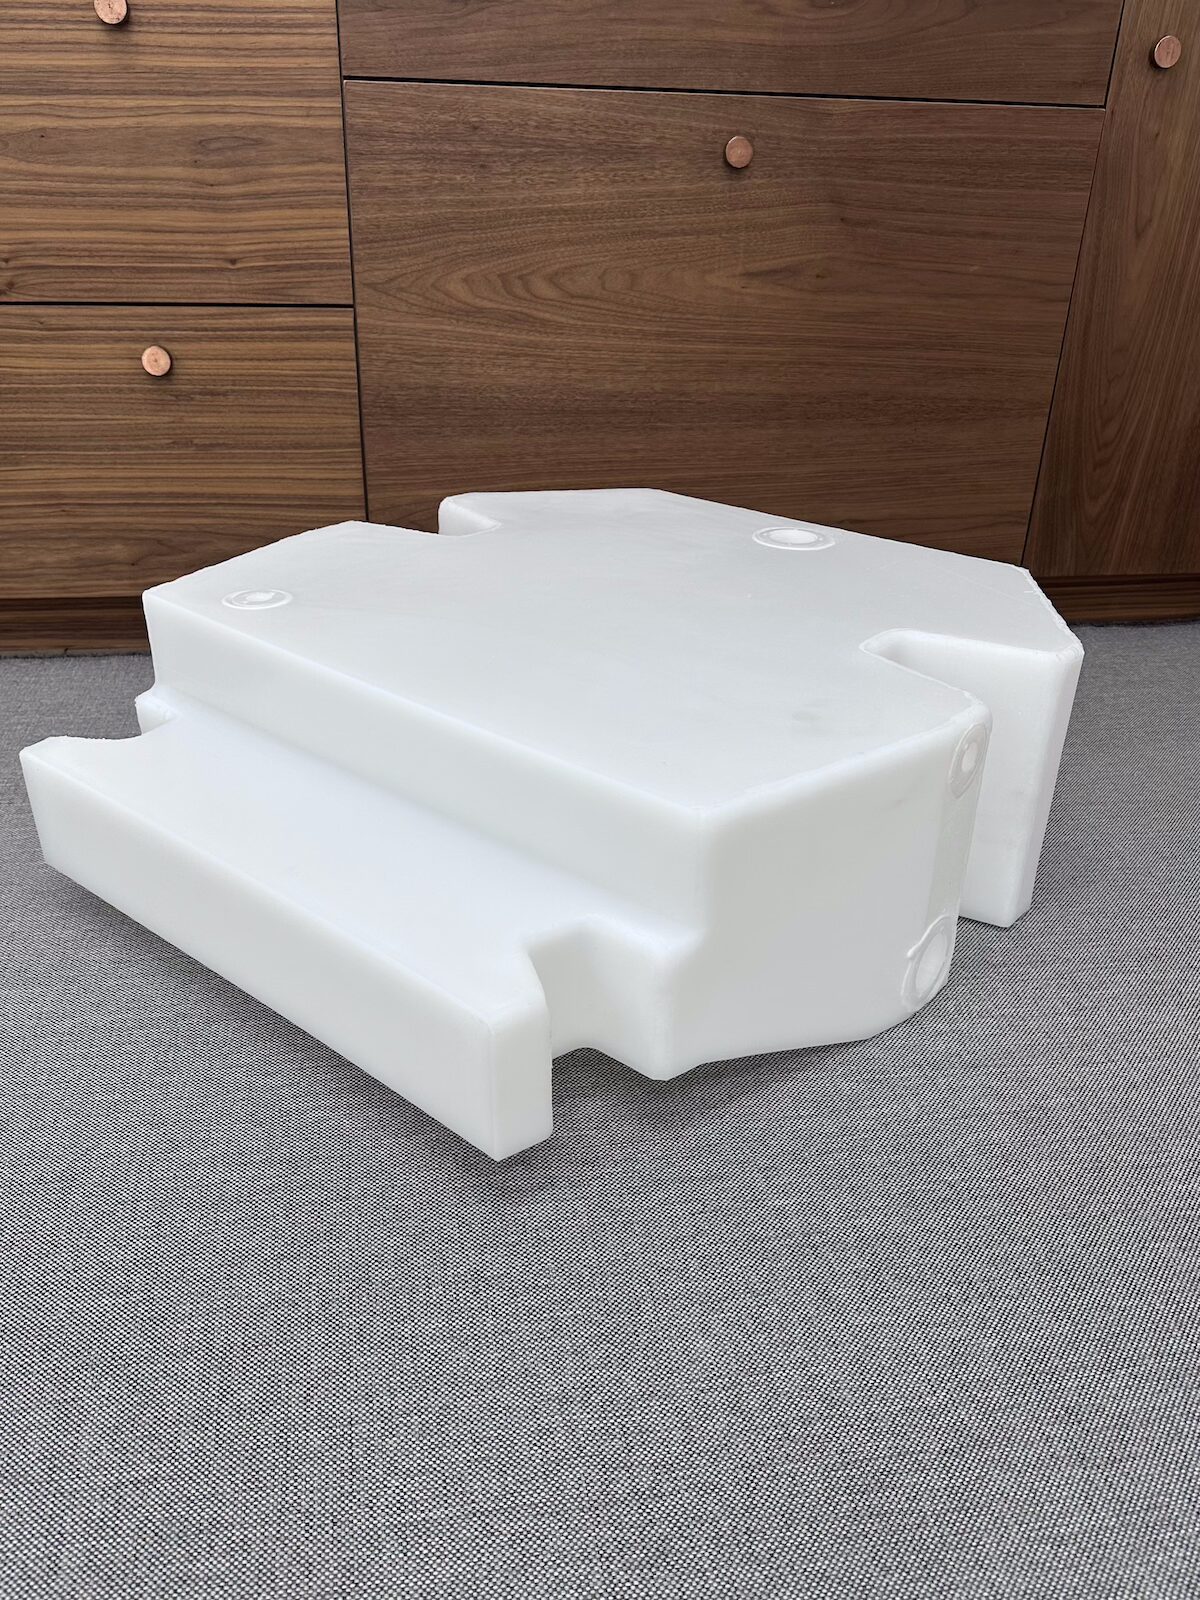
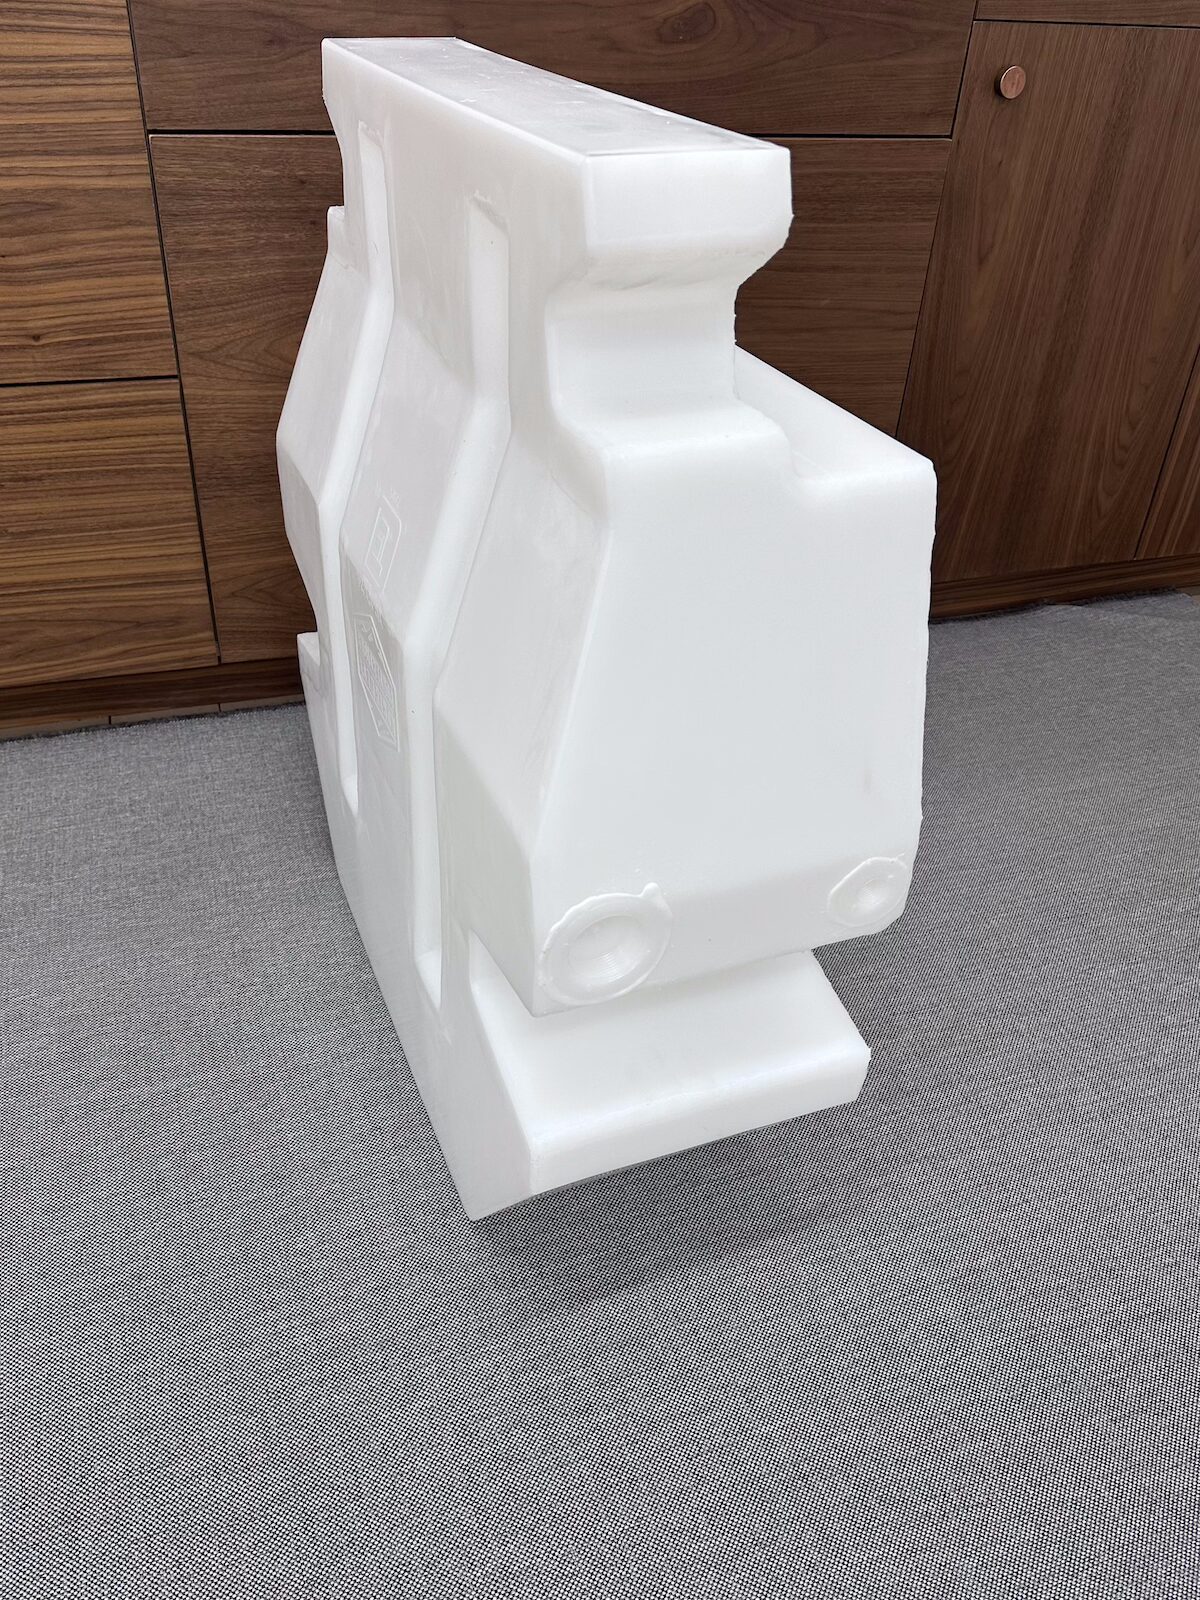
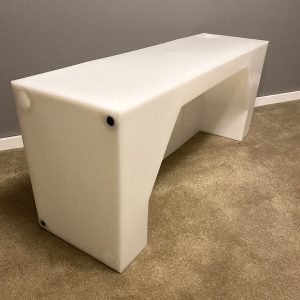
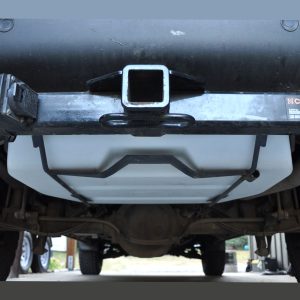
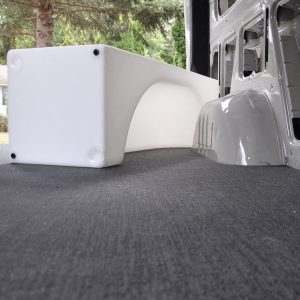
TRANSIT VAN SPARE TIRE WATER TANK

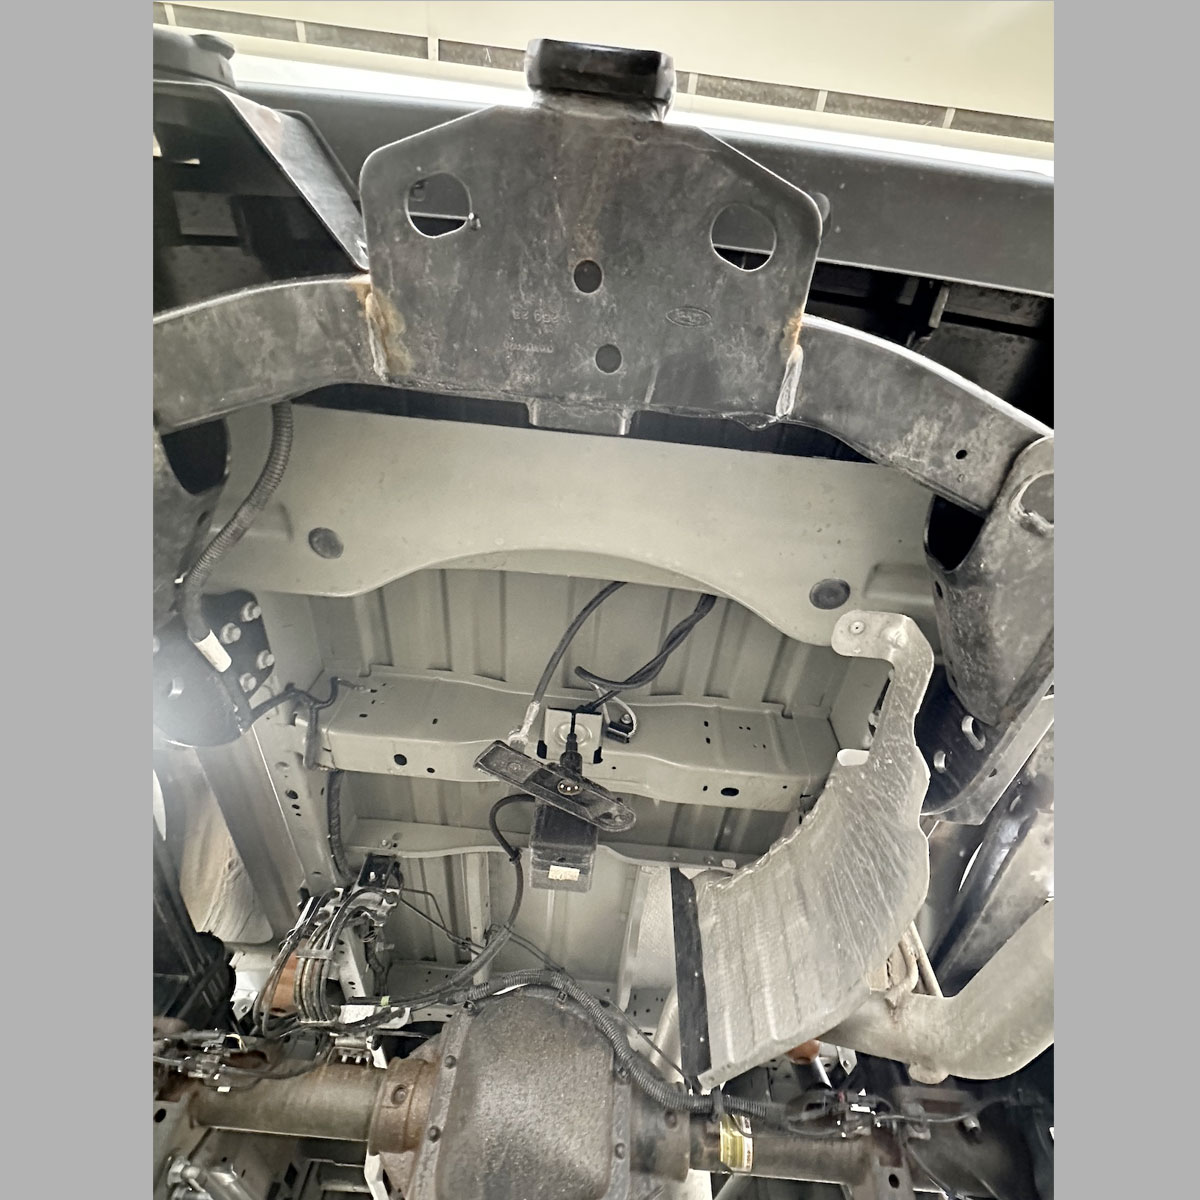
  • Designed to fit the spare tire location specific to the Ford Transit Van
  • Tank can be used for fresh or grey water
  • 24 Gallon Tank
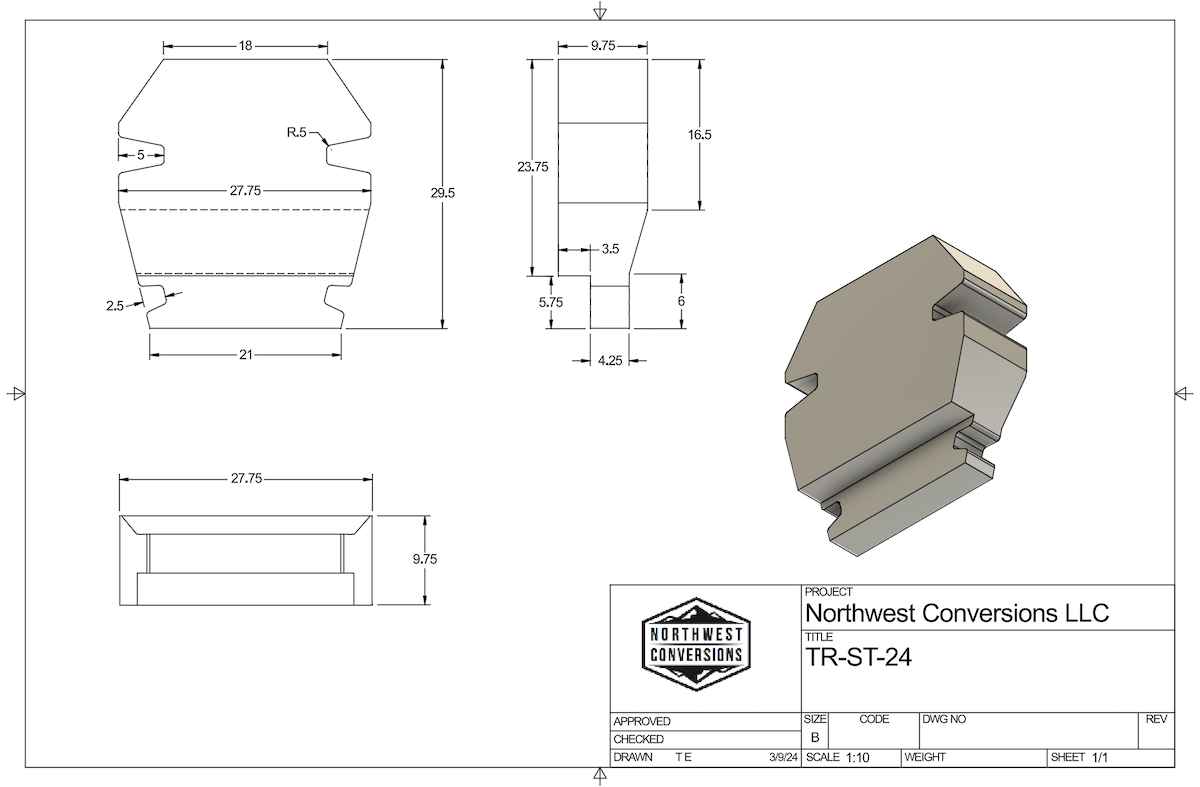
  • Overall dimensions are 28″ x 30″ x 9.75″ (+-)
  • Made from BPA Free, Food Grade polyethylene
  • Tank has (2) 1/2″ NPT and (2) 1.5″ NPT ports on driver side
  • Tank has (1) 1/2 NPT and (1) 1.5″ NPT port on top
  • Tank is designed to NOT be Pressurised (I.e. Needs to be vented)
  • 1/2″ mounting hardware and plates included
  • ***Please allow up to 10 days for Processing***
  • RETURNS are accepted up to 90 Days if the tank has not been installed or altered in any way.  The tank will need to be shipped back in the box purchased in and tracking information provided.  20% restocking fee.  Customer is responsible for return shipping.
  • Made in the USA

The 24 Gallon TR-ST-24 is designed specifically to fit the Ford Transit Van spare tire location mounted with the supplied hardware.  The tank may fit other makes and models.

Item is shipped from Bellingham, WA 98225.

Click image to view larger

STEP 1 — For mounting the TR-ST-24 water tank we will start by removing the factory spare tire from its location.  Please see owners manual for information.

STEP 2 — Once the tire is removed the factory cable mount will need to be removed from the bracket. This can be done by sliding the cable through the slot in the metal bracket. This assembly can be completely removed or it can be tied up above the mount and secured with cable ties or similar. The tire safety cable can be removed as well. There are 2 black rubber plugs noted in the picture that will need to be removed. These 2 holes are the locations for the smaller 7” L-bolts supplied with the tank. There are two similar holes for the 11” L-bolts on the crossmember where the factory tire hanger cable was located as noted in the picture.

Prep your water tank for installation: nwconversions.com/2020/10/09/van-build-water-tank-installation

Here are items to make note of:

  • Tanks need to be vented (i.e. non pressurized)
  • Water in, water out, drain and a tank sensor if needed.

STEP 3 — Begin by setting the tank in place and holding it up to the underneath of the van to get fitment.

STEP 4 — Once in place install the L-bolts. Larger bolts towards the front of the van and shorter bolts at the rear of the van locations.

STEP 5 — Install the flat plates included with the tank. The shorter of the two plates is for the rear 7” l-bolts and the wider plate is for the front 11” L-bolts. The washers and nyloc nuts will be placed next on the L-bolts.  Once all nyloc nuts are hand tight you can tighten all 4 snug so there is no “free play”.

The tank is now ready for plumbing.

Coming soon!